Rust Traps & Turrets Guide: Auto Turrets, Shotgun Traps & SAM Sites
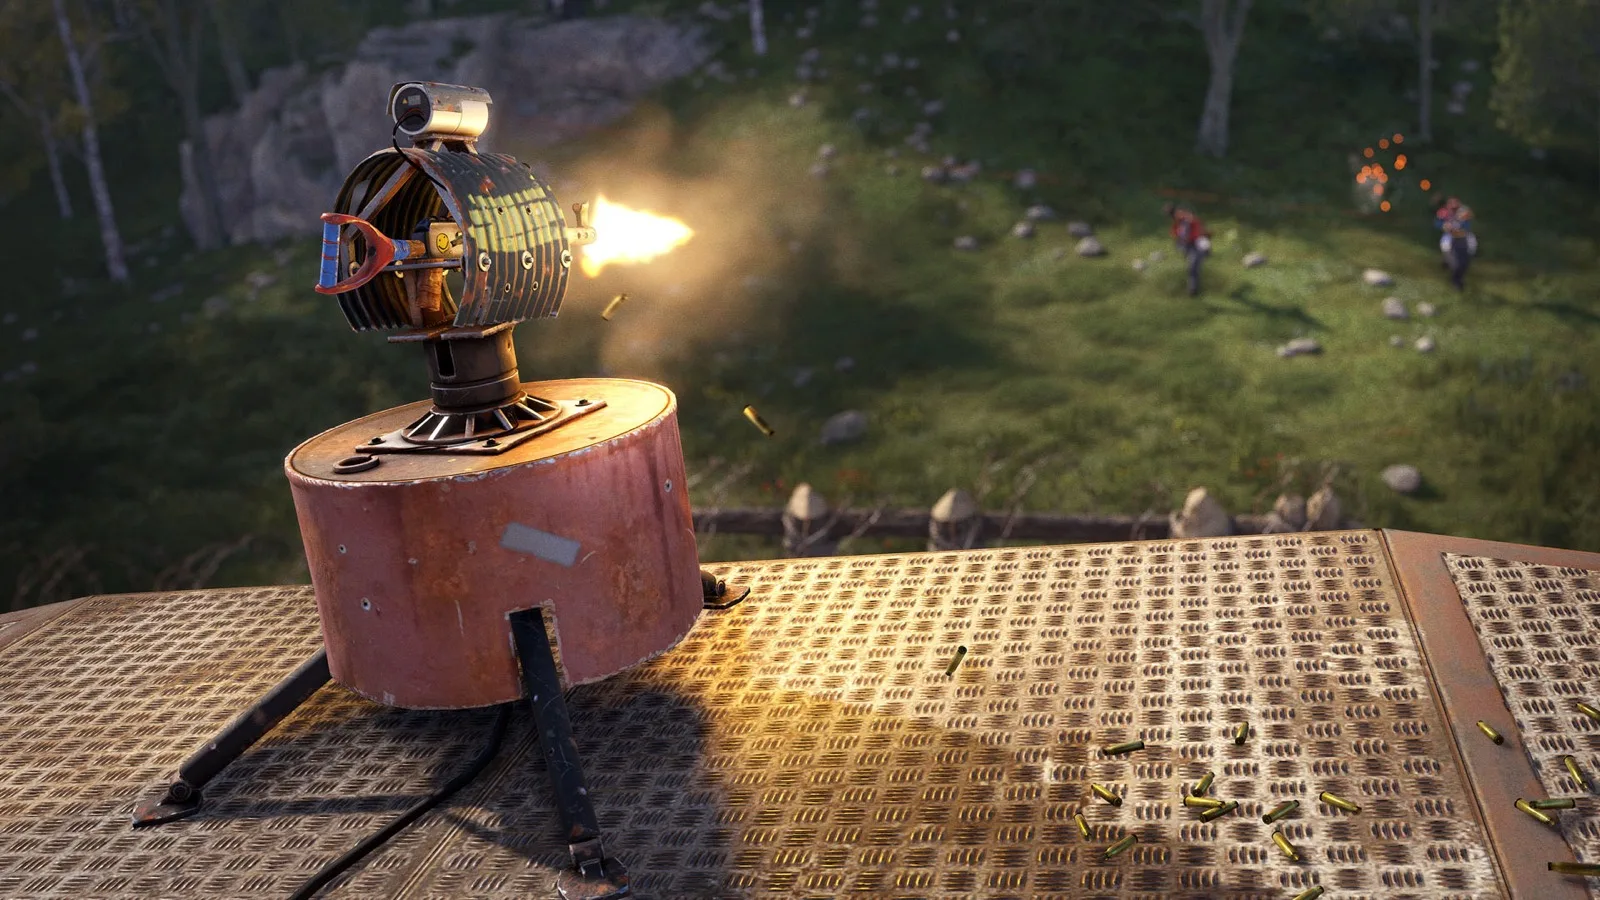
A base that shoots back survives longer than a base that's just thick. That's the whole pitch for traps in Rust: while you're offline or across the map, an auto turret, a shotgun trap, or a flame turret is standing guard for you, and a SAM site is knocking raiders' minicopters out of the sky. This guide covers every deployable defense worth placing — what each one costs to craft, how much power it eats, how tough it is, and the placement habits that separate a turret that gets farmed for free scrap from one that racks up a kill feed.
Quick reference before we go trap by trap:
| Defense | Craft cost | Workbench | Power | HP |
|---|---|---|---|---|
| Auto Turret | 10 HQM, 1 Targeting Computer, 1 CCTV Camera | Level 2 | 10 rW | 1000 |
| Shotgun Trap | 500 Wood, 250 Metal Fragments, 2 Gears, 2 Rope | Level 1 | None | 300 |
| Flame Turret | 200 Metal Fragments, 2 Empty Propane Tanks, 1 Gear | Level 1 | None (low grade fuel) | 300 |
| SAM Site | Not craftable — loot pickup | — | 25 rW | 1000 |
| Tesla Coil | 3 HQM, 1 Tech Trash | Level 2 | 25 rW (damage scales) | 250 |
| Snap Trap | 50 Metal Fragments, 1 Gear | Level 1 | None | 200 |
| Homemade Landmine | 50 Metal Fragments, 30 Gun Powder | Level 2 | None | 100 |
| Wooden Floor Spikes | 150 Wood | None | None | 100 |
Auto Turret: The King of Base Defense
The auto turret is the defense every base graduates toward. It costs 10 high quality metal, a targeting computer, and a CCTV camera at a Level 2 workbench, and runs 120 scrap to research directly (555 total scrap if you climb the tech tree to it). The components are the real cost — targeting computers and CCTV cameras come from crates and recyclers, not raw farm, so plan a loot run before you plan a turret wall.
Two things people miss on their first turret:
- chevron_rightIt ships empty. You have to load a projectile weapon into it plus the matching ammunition. No gun, no defense.
- chevron_rightThe arc faces you. When you place it, the turret watches a 180-degree arc facing toward you. Place it while standing where the raiders will come from, not from behind it, or your turret spends the wipe staring at a wall.
Two numbers from our datamine of Rust's files (verified 2026-08-04) define how it fights. Its sight range is 30 meters — past that, it simply doesn't see targets, which is why raiders sit at distance and plink. And its armor profile is lopsided: the turret body soaks the overwhelming majority of bullet and melee damage but has zero explosion resistance. That's the whole raid math — shooting a turret down is a marathon, but rockets and C4 hit it for full damage, so a turret exposed to a rocket line is spend-to-delay by design.
It draws 10 rW and only fires while powered, so a dead battery means a dead defense — the full component list is on the power usage chart, and the electricity calculator will size the solar-and-battery setup for however many turrets you're running.
Positioning meta, short version: turrets earn their cost when the attacker can't shoot back safely. Tuck them in corners covering doorways, behind window peeks, and up in compound towers with interlocking fields of fire — two turrets covering each other beat three turrets covering nothing in particular. A turret in the open on a flat wall is 1000 HP of free target practice; raiders will pick it apart from beyond its 30-meter sight range. And remember it's a raid target with a known destroy cost, so treat exposed turrets as a cost you impose, not a wall.
Shotgun Trap: Cheap, Powerless, Brutal
The shotgun trap is the best value in base defense. For 500 wood, 250 metal fragments, 2 gears, and 2 rope at a Level 1 workbench (60 scrap to research), you get a movement-triggered shotgun that needs no electricity at all. Load it with handmade shells and it just works, wipe after wipe of door campers.
Placement is everything, and the item description already tells you the meta: near doorways. The classic spots:
- chevron_rightInside the airlock, angled at the inner door, so anyone who breaches the first door eats shells before they touch the second.
- chevron_rightAbove door frames, pointing down — deep-diving raiders rarely check the ceiling.
- chevron_rightIn honeycomb and loot rooms, so a raider who blows a wall walks into a face full of pellets instead of your boxes.
At 300 HP it will get destroyed if raiders spot it first, which is exactly why you hide it around corners and behind doors instead of mounting it like a doorbell. It's authorized through the tool cupboard like everything else — see the tool cupboard guide if your own traps keep shooting your teammates.
Flame Turret: The Airlock Special
The flame turret is the budget option for early wipe: 200 metal fragments, 2 empty propane tanks, and 1 gear at Level 1, and only 30 scrap to research. Instead of power it burns low grade fuel, spraying flames when something triggers it.
It shines in the same places as the shotgun trap — airlocks and doorways — with one difference: fire covers an area and keeps hurting, so it punishes raiders who try to rush through a breach or stand still to place charges. It's also the trap you can afford on day one, when 10 HQM and a targeting computer are still a fantasy. Keep it topped up with fuel (the low grade guide covers the fastest sources) and remember it's only 300 HP — like the shotgun trap, concealment is its armor.
SAM Site: Your Anti-Air Battery
The SAM site is the odd one out: a recipe exists in Rust's files (50 High Quality Metal), but it's flagged not player-craftable in our item data, so treat it as a loot pickup rather than something you build at a bench. What you can craft is its ammunition — SAM ammo comes out 6 missiles per craft from 1 metal pipe and 30 gun powder at a Level 2 workbench.
Once placed and powered, it automatically fires guided missiles at helicopters and hot-air balloons in range — and the range is bigger than most people give it credit for. Per our datamine (verified 2026-08-04) it scans for air vehicles out to 150 meters and watches for incoming MLRS rockets out to 225 meters, intercepting them mid-flight. That makes it the direct counter to the two worst raid vectors in the game: the minicopter dropping raiders on your roof, and the MLRS barrage you can't otherwise answer. It's the hungriest common component on the grid at 25 rW — a SAM plus a couple of turrets is already serious solar-and-battery territory, so run your build through the electricity calculator before you wire it.
At 1000 HP it's tough, but its real weakness is ammo: a SAM with an empty magazine is a decoration. Stack SAM ammo in it like you stack shells in a shotgun trap. And if you're the one flying instead of defending, the flying guide covers what a SAM does to your minicopter and how pilots play around coverage.
Tesla Coil, Snap Trap, Landmines & Spikes: The Supporting Cast
None of these carry a defense on their own, but they're cheap enough to scatter everywhere:
Tesla Coil. 3 HQM and 1 tech trash at Level 2. An electrical trap that zaps nearby players when powered, and the damage scales directly with the power you feed it — per our datamine (verified 2026-08-04) it deals 1.4 damage per unit of power, capping at 35 damage per zap at a full 25 rW feed. Underfeed it and you get a doorbell, not a trap. It also damages itself as it discharges, so a coil that fires a lot needs repair visits. Classic use is wiring it behind an HBHF sensor (1 rW, 10-meter detection range) in a corridor raiders funnel through.
Snap Trap. The bear trap: 50 metal fragments and 1 gear at Level 1. Stepped on, it injures or outright kills — and you can pick it back up after it triggers, which makes it one of the few reusable traps in the game. Drop them in doorways, on roof access, and in the dark corners of your compound.
Homemade Landmine. 50 metal fragments and 30 gun powder (90 charcoal and 60 sulfur in raw materials) at Level 2. Bury a field of them around your external walls. The fun detail from the item itself: if you stand on one, a friend can disarm it before it goes off — so mined compounds punish solos hardest.
Wooden Floor Spikes. 150 wood, no workbench needed to craft. They slow and hurt anyone walking over them — near-zero damage output, but slowing a raider inside a shotgun trap's arc or a turret's line of fire is the whole point. Cheap enough to be flooring. Its little sibling, the Small Spike Trap (80 wood, also no workbench), does the same job in a smaller footprint for pre-workbench bases.
Wiring It All Together
The electric defenses stack up fast: 10 rW per auto turret, 25 rW per SAM site, up to 25 rW per tesla coil at full damage, 1 rW per HBHF sensor. A modest two-turret, one-SAM base is drawing 45 rW around the clock, which is beyond what a couple of solar panels can carry through the night. The power usage chart lists every component draw, the electricity guide covers circuits and batteries, and the electricity calculator turns your component list into a panels-and-batteries shopping list.
Design-wise, traps are a layer, not a substitute — they buy time and impose cost on top of good building. Wall and honeycomb decisions live in the base building guide, and if you want to see your defenses from the raider's side of the ledger, the raiding guide and the per-target raid cost pages show exactly what it costs to chew through them.
One note on trap bases — builds that exist purely to bait players inside and kill them for loot. They're legal, they're a Rust tradition, and on softcore or PvE-leaning community servers they're also a fast way to get server-banned, so read the rules before you build one. On a standard vanilla server, everything in this guide is fair game.
Frequently Asked Questions
What gun is best in an auto turret?expand_more
The turret takes any projectile weapon plus its matching ammo, so "best" is a budget call. The community default is a mid-tier gun with a big magazine and cheap ammo you can stockpile — SARs and SMGs as workhorse turret guns, AKs or LR-300s when you can afford to feed them. A turret is only as good as its ammo reserve, so a cheaper gun you keep stocked beats a top-tier gun that runs dry.
How much power does an auto turret need?expand_more
10 rW, and it only fires while powered — cut the power and the turret is inert. A SAM site draws 25 rW, and a tesla coil scales up to 25 rW at maximum damage, for comparison. The full list of component draws is on the power usage chart, and the electricity calculator will size the generation and battery setup for your whole defense grid.
How many rockets does it take to destroy an auto turret?expand_more
An auto turret has 1000 HP and takes 4 rockets, or 1 C4, or 3 high-velocity rockets, or 2 satchel charges to destroy. Raiders on a budget can also burn one down. Full method-by-method costs are on the auto turret raid page.
How far can an auto turret see and shoot?expand_more
30 meters, over the 180-degree arc set when you place it — both figures from our datamine of Rust's files. Anything beyond 30 meters is simply never engaged, no matter the gun loaded in it, which is why compound turrets are placed to force fights inside that bubble rather than to watch the horizon.
Does the flame turret need electricity?expand_more
No. The flame turret runs on low grade fuel, not power, and triggers automatically when someone gets in range — same with the shotgun trap, which just needs handmade shells. That's what makes both of them viable day-one defenses, long before your base has a single wire in it.
More Guides
A no-BS Rust base design guide: building tiers, upkeep, tool cupboards, bunkers, airlocks and honeycomb, plus the raid costs that actually matter.
Stop your turrets dying at night. Practical Rust electricity guide: rW, solar, wind, batteries, wiring and the only circuits a solo actually needs.
A practical Rust elevator guide: wiring power, stacking pieces, setting up call switches, and fixing dead, misaligned, or won't-stack lifts.